Last updated: October 12, 2026
Key Takeaways
- The right setup depends on volume and structure, not just speed.
- Starting from zero? One of three setups usually fits: manual editor workflow, import-based workflow, or API-driven workflow.
- “Just send the AI text into WordPress” skips the structural step that causes the most trouble.
- For unusual setups, the usual plugin-first answer may stop being useful.
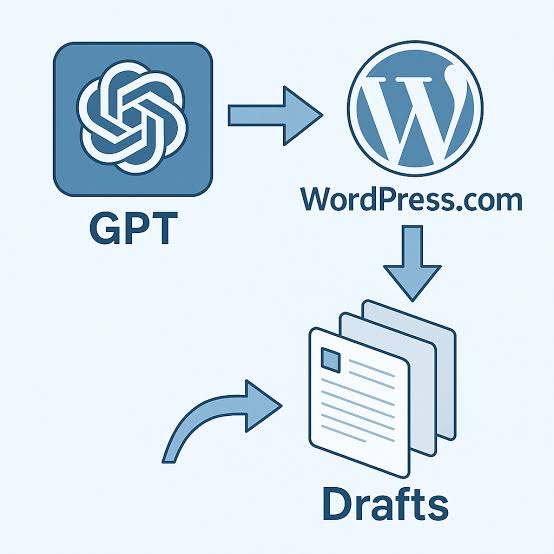
To publish AI articles to a custom post type in WordPress, you need a post type that already exists or one you create, a map for where the AI draft belongs, and automation only after you decide where editorial review happens. In practice, how to publish AI articles to custom post types in WordPress starts with structure, not prompts. The hard part is not the writing; it is getting the content into the right bucket with the right fields, status, and taxonomy so it behaves like normal content instead of a broken import. For many sites, the first working version takes 1 to 3 hours, while a robust API setup can take a full day or more.
What actually decides the right setup?
For a custom post type, the first question is whether it is meant for public posts, internal drafts, or structured records. That job description drives the workflow. A public “AI News” type can use the normal editor flow. A product library, knowledge base, or directory entry usually needs extra fields, a custom template, and stricter review. According to the WordPress REST API handbook, post types can be targeted directly through the API when they are registered correctly. See: https://developer.wordpress.org/rest-api/.
The common mistake is jumping straight to automation before the post type is ready. If the custom post type does not already have the right fields, then the AI output has nowhere clean to go. Need author name, summary, source URL, and featured image? Then ACF, Meta Box, or Pods is the right companion. Only title and body? The built-in editor is enough. ACF’s documentation shows how fields are attached to posts and post types: https://www.advancedcustomfields.com/resources/.
Here is the decision table I would use first:
| Situation | Best Path | Why Other Options Fail |
|---|---|---|
| You want AI posts on a blog-style custom post type | Use the REST API or a form/plugin that submits to the post type | CSV import is slower and breaks on revisions |
| You need structured fields like SKU, rating, or source | Use Advanced Custom Fields or Meta Box with mapped meta fields | Plain content blocks cannot reliably hold structured data |
| You want editorial review before publish | Save as draft or pending first |
Auto-publishing makes bad output visible too early |
| You need hundreds of items at once | Use WP All Import, WP-CLI, or a custom script | Manual publishing does not scale past a few dozen posts |
| You need custom taxonomy assignment | Map categories/tags or custom taxonomies in the import step | Leaving taxonomy blank makes the archive useless |
A plugin route is fine, but I would choose the simplest one that still preserves review. With a custom integration, the WordPress REST API is the cleanest long-term option because it handles post type, status, title, content, and meta in one request when configured correctly. Quick check: do you already know which fields belong in the custom post type, or are you still treating it like a normal blog post? If you are unsure, consult a WordPress developer or another professional who can map the fields safely.
How do I publish AI articles to a custom post type in WordPress?
You publish AI articles to a custom post type in WordPress by sending the generated content into that post type through the editor, an import tool, or the REST API, then assigning the correct status and metadata before it goes live. The path changes based on how many posts you need and how structured the content is. For a small site, that may be 5 posts a week; for a larger workflow, it may be 50 or 500.
For a small batch, a plugin-based workflow is usually fastest. For repeat work, automation wins. I would break it down like this:
- Create the custom post type first, using a plugin like Custom Post Type UI or code in a theme or plugin file.
- Add any custom fields you need with Advanced Custom Fields, Meta Box, or Pods.
- Decide whether the AI output should become a draft, pending review, or published content.
- Choose the transfer method: manual paste, import tool, or API submission.
- Map the AI output into title, content, excerpt, featured image, taxonomy, and custom fields.
- Review the first few posts on the front end, not just in the editor, because template issues often show up there.
- Only then automate the full batch.
For many sites, the REST API is the most durable option because it can target a custom post type directly. A request can send "type": "your_cpt_slug" along with content and status. Need images too? Usually you upload the media file first, then set the returned attachment ID as the featured image. If you are not comfortable with JSON or authentication, a plugin such as WP All Import may be easier, though less flexible for live AI workflows. WordPress documents the REST API response and endpoint behavior here: https://developer.wordpress.org/rest-api/reference/posts/.
The trade-off is plain: easier tools hide complexity, but they also hide failure until later. API-based publishing takes more setup, yet it gives you the most control over field mapping and review status. Quick check: are you publishing a one-off batch, or do you need a repeatable pipeline every week? A one-off batch may only need 10 minutes of setup, while a repeatable pipeline usually needs testing across at least 3 sample posts.
The three setup paths that actually work
From zero, one of three setups will fit: manual editor workflow, import-based workflow, or API-driven workflow. The wrong choice is usually the one that looks easiest on day one but collapses when the post type grows extra fields. On a simple site, the manual path may be enough; on a structured site, the API path can save hours later.
1) Manual editor workflow
Only a few AI posts a week? Manual entry is fine. Generate the text, paste it into the editor for the custom post type, add the taxonomies, set the featured image, and save as draft. This works best for editorial teams that want human judgment on every piece. It falls apart when you need bulk publishing or when every post needs the same structured meta.
2) Import-based workflow
Already have content in CSV, XML, or JSON? Then WP All Import can map that content into a custom post type. This is useful for content libraries, directories, and resource hubs. The drawback is that imports are batch-oriented, so they are slower to adapt when your schema changes. A field rename can break the mapping until you update the template. WP All Import’s documentation covers custom post type mapping: https://www.wpallimport.com/documentation/custom-post-types/.
3) API-driven workflow
Want AI generation plus publishing in the same pipeline? Then a script or automation tool that calls the WordPress REST API is the cleanest path. This is where tools like Zapier, Make, n8n, or your own Python/Node script can fit. Speed and precision are the upside. Auth, error handling, and media uploads are the downside; skip testing, and the wheels come off fast.
If your custom post type has 10 or fewer fields and the content changes often, I would usually avoid overbuilding. A simple draft workflow is safer than a fragile automation chain. Quick check: do you need speed, or do you need fewer ways for the post type to break?
What the standard advice gets wrong
“Just send the AI text into WordPress” skips the part that causes the most trouble: content structure. A custom post type is not just a different label in the admin menu. It can have its own archive, template, taxonomies, author rules, and meta fields.
Publishing body copy without mapping the supporting data is the biggest failure mode. A review post type without rating fields is incomplete. A recipe post type without ingredients and prep time is nearly unusable. A case study post type without client, industry, and outcome fields reads like a generic post instead of the structured record the site needs.
With an AI model such as GPT-4.1, Claude, or Gemini, I would treat the model as a drafting engine, not a publisher. Consult a professional if you are not sure how the post type should be structured. Generate in structured output first: title, slug, intro, main body, excerpt, tags, and custom fields. Then validate the result before it reaches WordPress. If your pipeline can only output a blob of text, expect cleanup work every time.
This is where plugins help less than people expect. A plugin can publish content, but it cannot decide whether that content belongs in the post type. That judgment is yours. If the post type is a directory listing, then long-form prose is the wrong payload. If the post type is a tutorial archive, then one-line summaries are too thin.
For sites where each post must pass legal, medical, financial, or compliance review, I would not recommend full automation. In those cases, a draft-first process with human approval is the safer route. Quick check: does your post type need structure beyond a title and a body?
Edge cases where the normal advice breaks down
For unusual setups, the usual plugin-first answer stops being useful. These are the cases where the shape of the content changes the method.
-
Situation: multilingual site
What changes: the AI post may need translation fields, language-specific slugs, and separate archives.
What to do instead: use WPML or Polylang with a workflow that creates the base post type entry first, then sends localized versions through the translation layer. -
Situation: the custom post type uses a page builder template
What changes: the post type may rely on builder-specific meta instead of standard content.
What to do instead: map only the fields the builder expects, and test the front end in Elementor or another builder before bulk publishing. -
Situation: you need featured media for every post
What changes: media upload becomes part of the publishing pipeline.
What to do instead: upload the image first through the media endpoint, then attach the media ID to the post. Do not assume a remote image URL will render reliably forever. -
Situation: each post needs custom taxonomy terms created on the fly
What changes: the term must exist before assignment, or the post may publish without proper organization.
What to do instead: create the term in the same automation step or use a lookup table before posting. -
Situation: the post type is private or internal
What changes: visibility, user roles, and permissions matter more than content generation.
What to do instead: publish asprivateordraft, restrict roles, and check capability settings on the post type. -
Situation: the AI output is highly variable
What changes: the schema may not match from one post to the next.
What to do instead: force a fixed structure in the prompt, or use a middleware step that normalizes the output before WordPress sees it. A normalization step can reduce cleanup time from 15 minutes to 2 minutes per post.
These edge cases are where I would slow down. Speed is easy; consistency is the real work. Quick check: is your post type simple enough for a direct pipeline, or does it need translation, media, or builder-specific fields?
Step-by-step: the cleanest API workflow
For a repeatable system, I would build one pipeline that generates, validates, and posts the post in that order. The REST API route is the most controllable, even though it takes more setup than a plugin. It is also the easiest way to keep the same structure across 20, 50, or 500 posts.
- Register the custom post type with a clear slug, like `guides`, `reviews`, or `knowledge_base`.
- Confirm the post type supports `title`, `editor`, `excerpt`, `thumbnail`, and `custom-fields` if you need them.
- Set up authentication for the API using an application password, OAuth, or a plugin that handles credentials safely.
- Generate the AI post in a fixed schema: title, slug, body, excerpt, tags, and custom fields.
- Run a validation step to catch empty titles, duplicate slugs, missing required fields, or unsafe HTML.
- POST the content to `/wp-json/wp/v2/{your_post_type}` with status set to `draft` or `pending`.
- If needed, upload the featured image separately, then attach its ID to the post.
- Open the drafted post in the admin and verify the archive page, template, and schema fields before publishing.
The benefit of this flow is consistency. The cost is that you need to maintain the schema and watch for API changes. If your site uses ACF, you may also need to register or expose custom fields correctly so the API accepts them. If your server hardens authentication, that can be another friction point.
I would use this route when the post type matters enough that “mostly correct” is not good enough. Quick check: do you need a workflow you can repeat 50 times without hand-editing every post?
A short checklist before you publish
Close to launch? Run this checklist every time: the post type exists, the fields exist, the template displays them, the status is correct, and the content lands in the right archive. If any one of those is wrong, the post may exist in the dashboard but still fail on the site.
Before you publish, check these five things:
- The custom post type slug is correct.
- Required meta fields are filled.
- Taxonomies are assigned.
- The featured image appears in the template.
- The post renders correctly on mobile, not just in the editor.
Using AI heavily? Then also check for repeated phrasing, placeholder text, and hallucinated references. A 2-minute review catches more damage than a plugin ever will. I would especially watch for empty subheadings and generic intros, because those make custom post type archives look thin. On a larger site, that review can prevent 10 or more broken posts from going live at once.
The best setup is usually not the most automated one. It is the one that lets you publish quickly without letting the wrong content escape. Quick check: if this post went live now, would the front end display everything the post type needs?
FAQ
Can I publish AI-generated content directly to a custom post type?
Yes, if the post type is registered and your tool can target that slug through the editor, an import tool, or the REST API.
Do I need a plugin to do this?
No. A plugin is convenient, but a custom integration through the REST API can handle the job more cleanly for repeat publishing.
Should AI posts go live as soon as they are created?
Usually no. I would start with draft or pending unless the content is low-risk and heavily templated.
What if my custom post type has custom fields?
Then you need to map those fields explicitly. A title and body alone will not fill a structured record.
Which is better: WP All Import or the REST API?
WP All Import is easier for batch imports. The REST API is better when you want a live generation-to-publication pipeline.
Drafted with AI; not yet reviewed by a person.